20 years jewelry packaging manufacturer,
Serving 1000+brands,Passed ISO9001/BV/SGS


You can share
- Share to Facebook
- Share to Google+
- Subscribe to our
- Share to Linkedin
- Share to Twitter
You can share

Many jewelry startups or cross-industry sellers often hit a frustrating snag when preparing their packaging: they have brilliant unboxing concepts—even down to the surface texture—but lack professional design blueprints. This triggers a common anxiety: "Will a jewelry box factory even entertain me without source files or 3D renderings? Can they handle the entire design process for me?"
The answer is yes, but it requires a smart strategy involving "managing up" and "cross-disciplinary translation." Today, we’ll break down how to get perfectly in sync with manufacturers—even starting with "zero design assets"—and turn your mental concepts into tangible products.
First, we need to bridge a critical gap in understanding: the vast majority of pure-play jewelry box factories don't employ "Graphic Designers" in the traditional sense; instead, they staff hardcore "Packaging Structural Engineers."
What they aren't good at: conceptualizing narrative-driven logo layouts for your brand, curating a stunning "Old Money" Pantone color palette, or hand-drawing original botanical pattern backgrounds.
What they excel at: taking your vague concept and calculating the load-bearing capacity of high-density chipboard, planning precise V-cut angles, using professional software to draft flawless CAD die-line drawings, and advising exactly what inner-to-outer box tolerances are needed to achieve that slow, smooth "dampened" sliding feel you desire.
Therefore, what the factory offers is "engineering-driven design translation," not "original brand visual design." Recognizing this distinction is the first step toward preventing communication breakdowns later on.
When you lack ready-made vector source files (such as AI or CDR formats) for your jewelry box design, be sure to follow these three steps to establish effective communication with the factory:
(1) Create a "Visual Mood Board" and Communicate Using Physical Objects
Avoid tormenting the factory's sales representatives with abstract terms like "high-end," "grand," or "ultra-minimalist." The most effective and direct approach is to gather reference images online or—even better—purchase a few existing boxes from retail counters that you admire for their tactile feel and structure, then send them to the factory. Clearly instruct the prototype maker: "I want the damped sliding mechanism from Box A, the leather-like surface texture of Box B, and the anti-tarnish microfiber lining found in Box C." Using physical objects to establish reference points is far more efficient than a thousand words of description.
(2) Stand on the Shoulders of Giants: Leverage "Stock Molds" and "Micro-Customization."
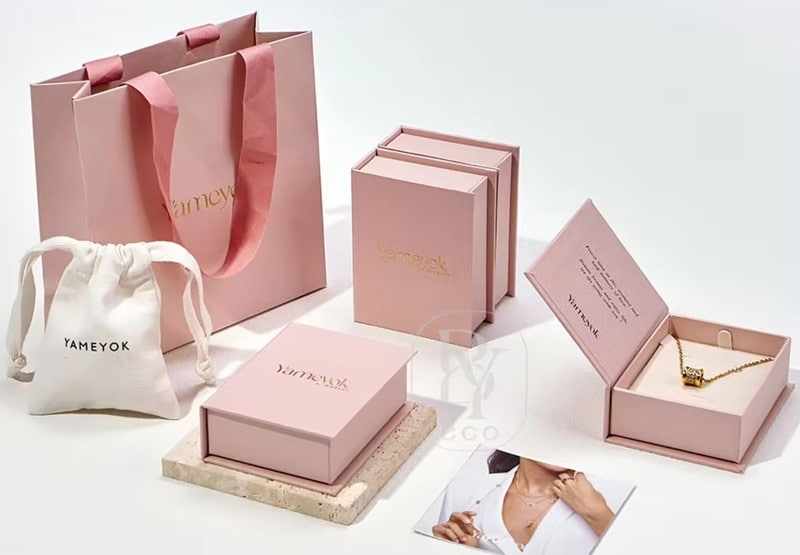
If you have no idea about the structural design and are working with a limited budget, simply ask the jewelry box factory to provide their library of existing "stock die-cut templates." Top-tier factories accumulate hundreds of market-proven box designs annually. You can select a base mold with perfect physical dimensions and then apply "micro-customization"—such as switching to a rare imported pearlescent paper finish or using a special debossing technique for the logo. This approach saves you from the high costs of creating new molds and structural testing while ensuring your brand packaging remains visually unique.
(3) Prioritize Structure and Insist on a "White Dummy" Prototype
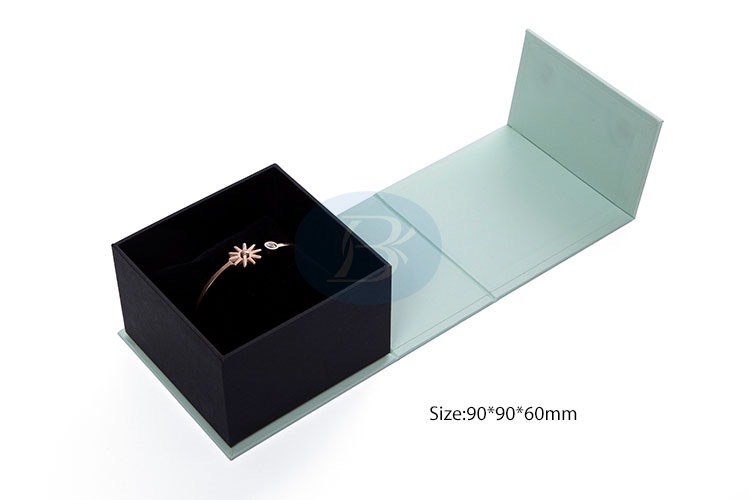
Before finalizing visual elements (like colors or foil-stamping details), have the factory engineer create a "White Dummy" for you. This is a 3D physical model cut and assembled from plain white cardstock or unprinted greyboard to actual scale. Once you receive the dummy, be sure to place your actual necklace or ring inside to repeatedly test the spatial proportions, check if the inserts are too tight, and ensure the item is easy to retrieve. All structural corrections for the **jewelry box design** must be fully resolved during this stage, where costs are at their lowest.
If your brand requires highly complex original illustrations or needs to build a complete visual packaging system from scratch—one that embodies your brand identity (VI)—the most reliable strategy is a "dual-track" approach:
Hire a professional freelance graphic designer (or design studio) to handle the 2D visual artwork and layout. Simultaneously, have the factory provide a "die-cut template" (or "unfolded layout") with precise dimensional specifications. The designer then perfectly fits the artwork into the die-cut lines and submits the finalized, standardized file to the jewelry box factory for prototyping and mass production. This is the most efficient workflow, allowing each party to focus on their area of expertise and complement one another.
Q1: Is it okay to submit just a high-resolution JPG file of the logo to the factory for prototyping?
A1: It is strongly discouraged. Professional factories require vector files—such as AI (Adobe Illustrator), CDR (CorelDRAW), or PDF—when printing or creating hot-stamping dies. While the factory might offer to convert your JPG into a vector format, the automated tracing process often causes a loss of edge sharpness in the original typeface, resulting in blurred or distorted edges on the printed letters.
Q2: Can I place a scented card infused with brand-name perfume inside the jewelry box?
A2: It carries a very high risk. Commercial perfumes and essential oils contain complex volatile chemical solvents (such as alcohols and esters). In the confined space of the packaging, these highly concentrated chemicals can easily trigger redox reactions with the surfaces of karat gold or sterling silver jewelry, causing severe tarnishing or discoloration during shipping. If you wish to create an olfactory experience, you must use non-corrosive, solid-state micro-encapsulated fragrances that have passed chemical inertness testing.
Q3: Why is there a color discrepancy between the stunning colors I approved on my Apple computer screen and the actual boxes printed by the factory?
A3: Because computer and mobile screens use the RGB color mode (which offers a vast, vibrant color gamut) to emit light, whereas printing presses use the CMYK four-color ink mode, the underlying principles of color reproduction for these two systems are completely different. Furthermore, the same ink printed on reflective coated paper versus highly absorbent, rough kraft paper will yield vastly different colors to the naked eye. Therefore, you should never approve a bulk order based solely on screen colors; you must insist that the factory provide a physical "press proof" before mass production begins.
Q4: I have a concept for a unique triangular pyramid-shaped jewelry box; will the factory refuse the order?
A4: As long as the order volume meets the minimum requirement, factories generally won't turn the business away. However, you must account for the hidden commercial costs associated with non-standard box shapes: their unique geometry prevents compact, dense stacking on standard shipping pallets, resulting in significant wasted space during transport. Additionally, boxes with highly irregular shapes are difficult to fit into standard square corrugated shipping cartons for e-commerce fulfillment, causing logistics and packaging costs to skyrocket.
Q5: Can I design a large "die-cut transparent window" on the top of the paper box to showcase a sparkling gemstone?
A5: Theoretically, this can be achieved by die-cutting the paper and applying a transparent PET window, but you should exercise caution regarding long-term preservation. First, removing a large section of paper severely compromises the structural rigidity of the lid, making it highly susceptible to crushing or deformation under the heavy loads often encountered during shipping. Second, while transparent windows look attractive, they do not block direct UV rays; prolonged exposure to store lighting or sunlight can accelerate the fading and degradation of the flocked lining inside. For high-end jewelry that requires protection from light for long-term storage, a fully enclosed, rigid structure remains the best choice.